Choose your Wallpaper design
Our unique collection of wallpaper designs are created by our own design team. We also stock premium wallpapers from around the world.
A great place to start is our popular Grasscloth wallpaper, or you can browse our full range of wallpaper designs. Yes, samples are available for purchase.
Before you start
You will need
- Wallpaper
- Wallpaper paste
- Paint brush, medium nap roller and tray
- Ladder
- Pencil
- Plumb bob
- Utility knife
- Wallpaper smoother
- Tape measure
Inspection
- Inspect every roll to ensure that all rolls are in good condition, with no variation in shade, and that no other faults are present. We cannot accept liability for defects that are apparent at the time of hanging, nor can we be responsible for any consequential loss.
- After hanging two or three lengths/panels, we recommend that you inspect the results.
Preparation
- The wall should be made as clean as possible. Remove any dirt, old wallpaper or flaking paint. Using a suitable filler to even out cracks and irregularities to achieve a smooth finish.
- Sand and prime the filled areas. Priming seals the filler, which prevents the paste from drying at a different rate (which may cause the paper to bubble). Once you’ve smoothed, filled and sanded your wall, make sure all surfaces are clean and dry.
- To achieve perfect edges, before you hang your wallpaper, you may need to paint the wall in a similar colour to the wallpaper you are applying to ensure that the background does not show through the seams where the edges of the wallpaper meet, or at the top or bottom edge of the paper.
- Porter’s wallpapers are “paste-the-wall” wallcoverings and use a special backing containing “non-woven” or polyester fibres. This means that the wallcovering is dimensionally stable and does not expand when wet, allowing the paper to be hung dry from the roll, reducing the installation time by around half. No paste table is needed, there is no soaking time and it is easier to cut around light switches and sockets because the paper is dry.
Suitability
To get the best performance out of your wallpaper, please take the following points into consideration:
- While our papers can be hung in bathrooms and kitchens, they are not suitable for high humidity or wet areas. If planning to paper a humid room, please ensure the room is well ventilated and the paper is installed using a mould and mildew inhibiting paste. Avoid any direct contact with water.
- Please ensure enough ventilation. Whilst our papers are wipeable, they are not water-proof.
- Air the room. Do not shut up a room of newly hung wallpaper but leave it to air and maintain a normal room temperature to ensure the wallpaper dries properly. The room and wall should be kept at a minimum temperature of 18 °C.
Hanging the paper
Step 1: Planning
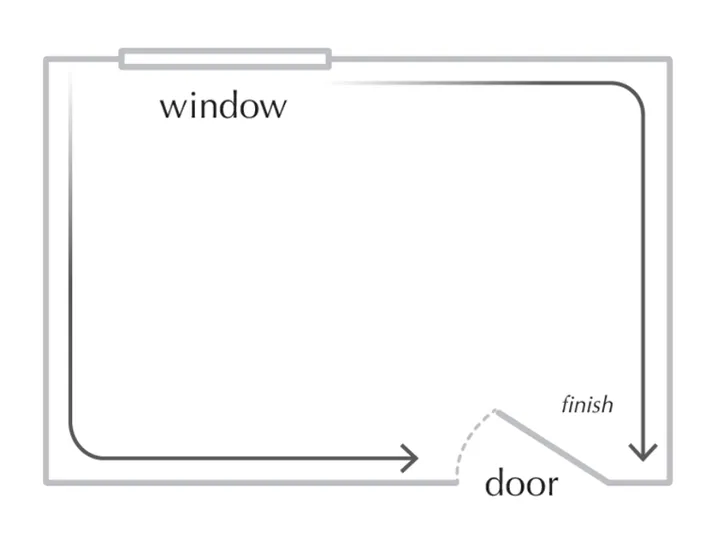
When installing wallpaper, a good tip is to always work away from the main source of light and finish in the least conspicuous corner.
Firstly, cut the header off your roll. You can use this piece as a template to measure the width required for your drops.
Step 2: Measuring
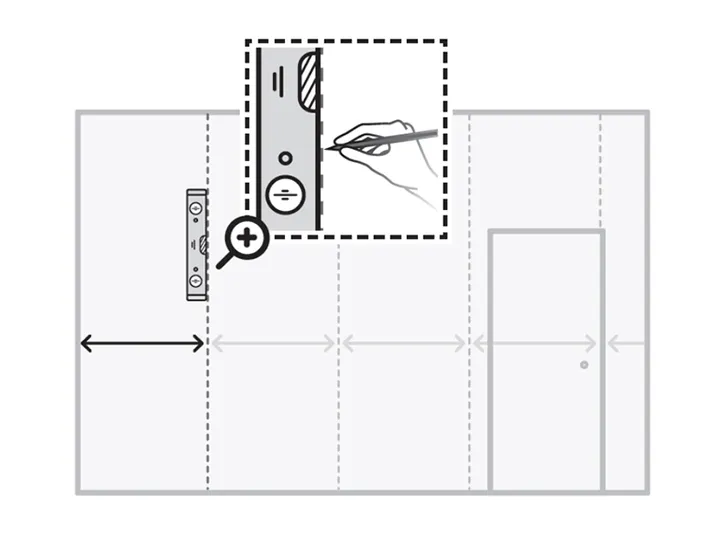
Using the header from the roll, measure this amount out from the corner (in the direction you are going) minus 2cm.
Put a mark close to the ceiling at this point. This is where you start your spirit level or plumb-line from and will allow a 2cm overlap around the corner.
Mark down the plumb line every 20-30cm, and this will give you a good vertical line to hang your first length to. Use pencil only.
Step 3: Paste the wall
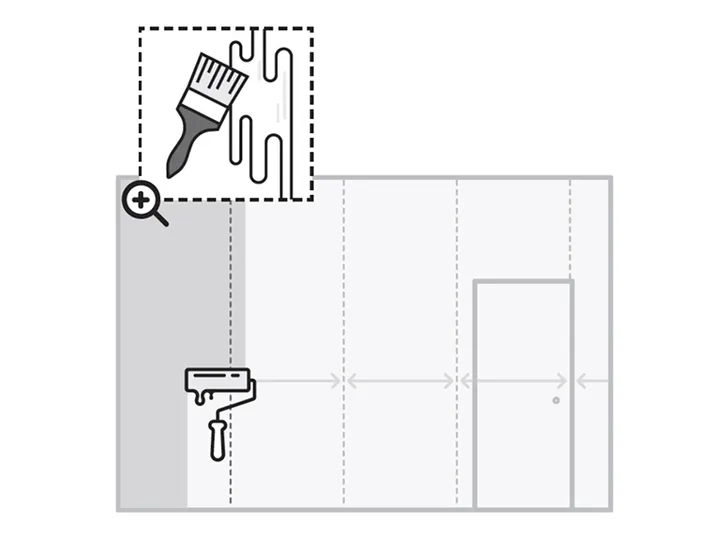
Our wallpapers are made using a non-woven base, which means that you apply the adhesive directly to the wall. Start by pasting an area enough to cover just over one drop width at a time. For best results apply a good, evenly spread coating of paste on the wall.
Use a paint brush to cut-in around areas too tight for the roller, such as at the ceiling line, in corners and along skirting boards and trim.
Step 4: Hanging the first drop
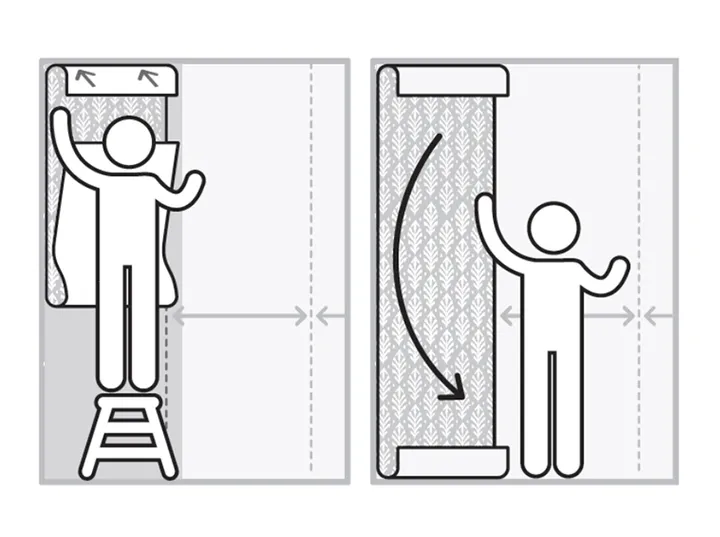
Align the top of the roll to the wall in the correct position, while also aligning with the marks that were made down the vertical plumb line.
Carefully smooth your hand over the paper so that it sticks to the wall, and gently unroll the paper as you climb down the ladder, until the wallpaper roll is sitting on the floor. Cut the wallpaper from the roll, below where the wall meets the skirting.
If you make a mistake, remove the length and start again. Apply more adhesive if the first coat has dried.
Step 5: Smoothing
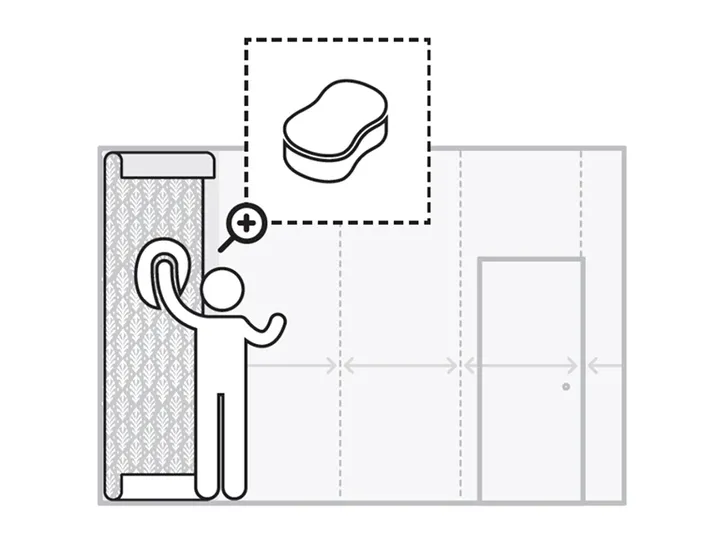
To get rid of air pockets use a clean unused paint roller, sponge or wallpaper smoothing brush, taking care not to squeeze out the paste between the joins and ensure the paste does not get onto the smoothing roller or sponge.
Work from the ceiling to the floor and from the middle to the edges. Do not use any hard tool that would damage the surface.
Step 6: Hanging the second drop
Paste the wall, ensuring the adhesive is applied right to the edges and a little further than the width of the wallpaper. It is important that adhesive be applied right out to the edges to ensure the lengths adhere to the wall properly.
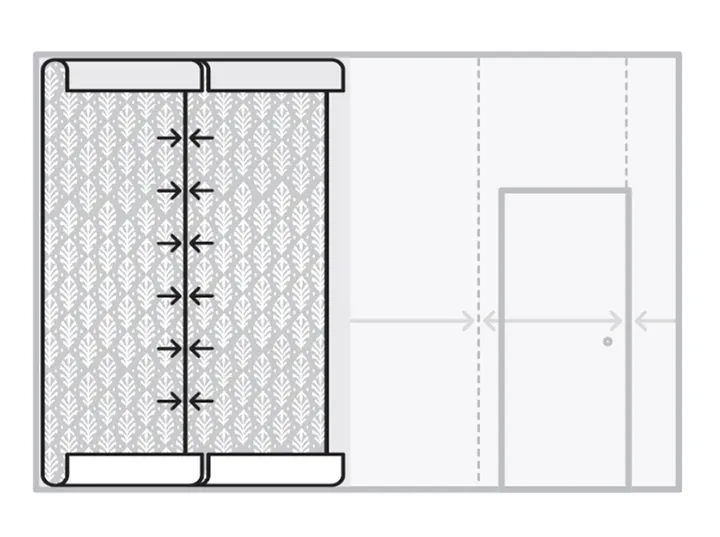
Butt join the wallpaper together, matching up the pattern at the edges. Ensure that the paper is properly positioned, that the pattern is matching and there is no surface visible at the joints.
Follow the same process as Step 4, smoothing and gently unrolling the paper as you step down from the ladder. Cut the wallpaper from the roll, below where the wall meets the skirting.
Step 7: Trimming
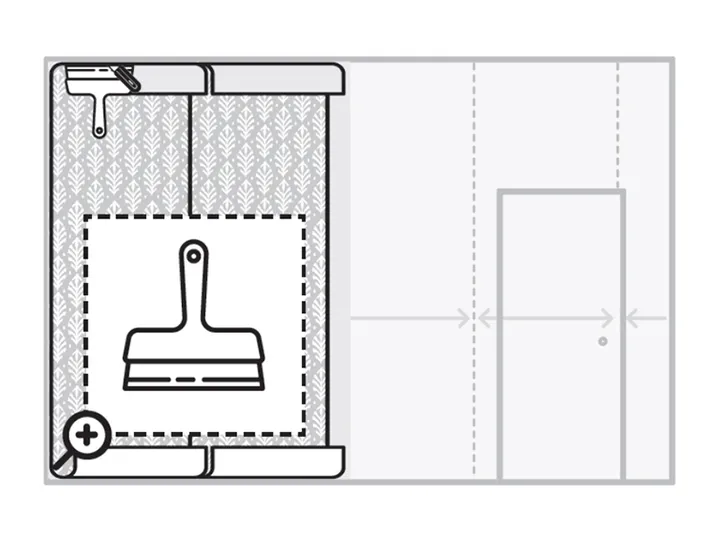
When you are happy with the position, using a straight edge, trim the excess wallpaper at the top and bottom of the wall. Use a sharp snap-off blade knife. Push the paper into the ceiling line and skirting.
Replace the blade often, as a dull blade can easily tear the wallpaper.
Step 8: Continue
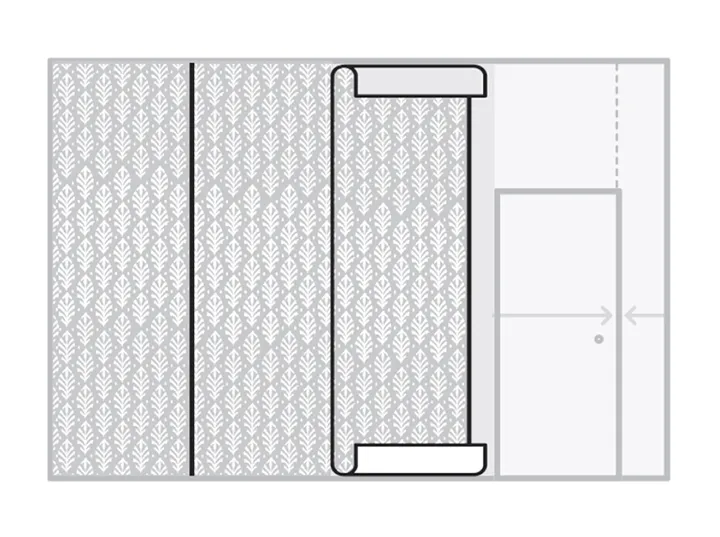
Continue in this manner until the wall is finished. Our papers have a traditional matt finish, so you can wipe off any shiny marks from the paste with a damp, soft cloth.
Use a soft clean dry cloth to remove any residual water from the damp cloth to prevent marking.
Cleaning and Care
- Our wallpapers are washable using a mild soap that does not contain detergent.
- Wipe with a cloth dampened with clear clean water and dry with a soft, clean cloth.
- Stains caused by grease and oil may not necessarily be removed.
- Do not use abrasives.
- Do not rub.


